
Thoughts: This is my favorite time of year. The weather is getting cooler, which makes it more fun to be outside. My garden is going strong. I’ve put a greenhouse on one side of our house, and I’ve replaced some old raised beds in our garden. My favorite holidays are in the fall as well. Halloween was my favorite when I was a kid in Pennsylvania, smelling fallen leaves in the cool evening air as I approached another house, ready to augment my harvest of colorful candy! Nowadays, though, since they don’t allow me to Trick or Treat, I look forward to Thanksgiving: a time to be with family and enjoy the harvest from the garden. No matter what your spiritual persuasion, I’m sure that most of us feel thankful to live on this special planet on which we can grow our own food and enjoy the beauty of the plant world.
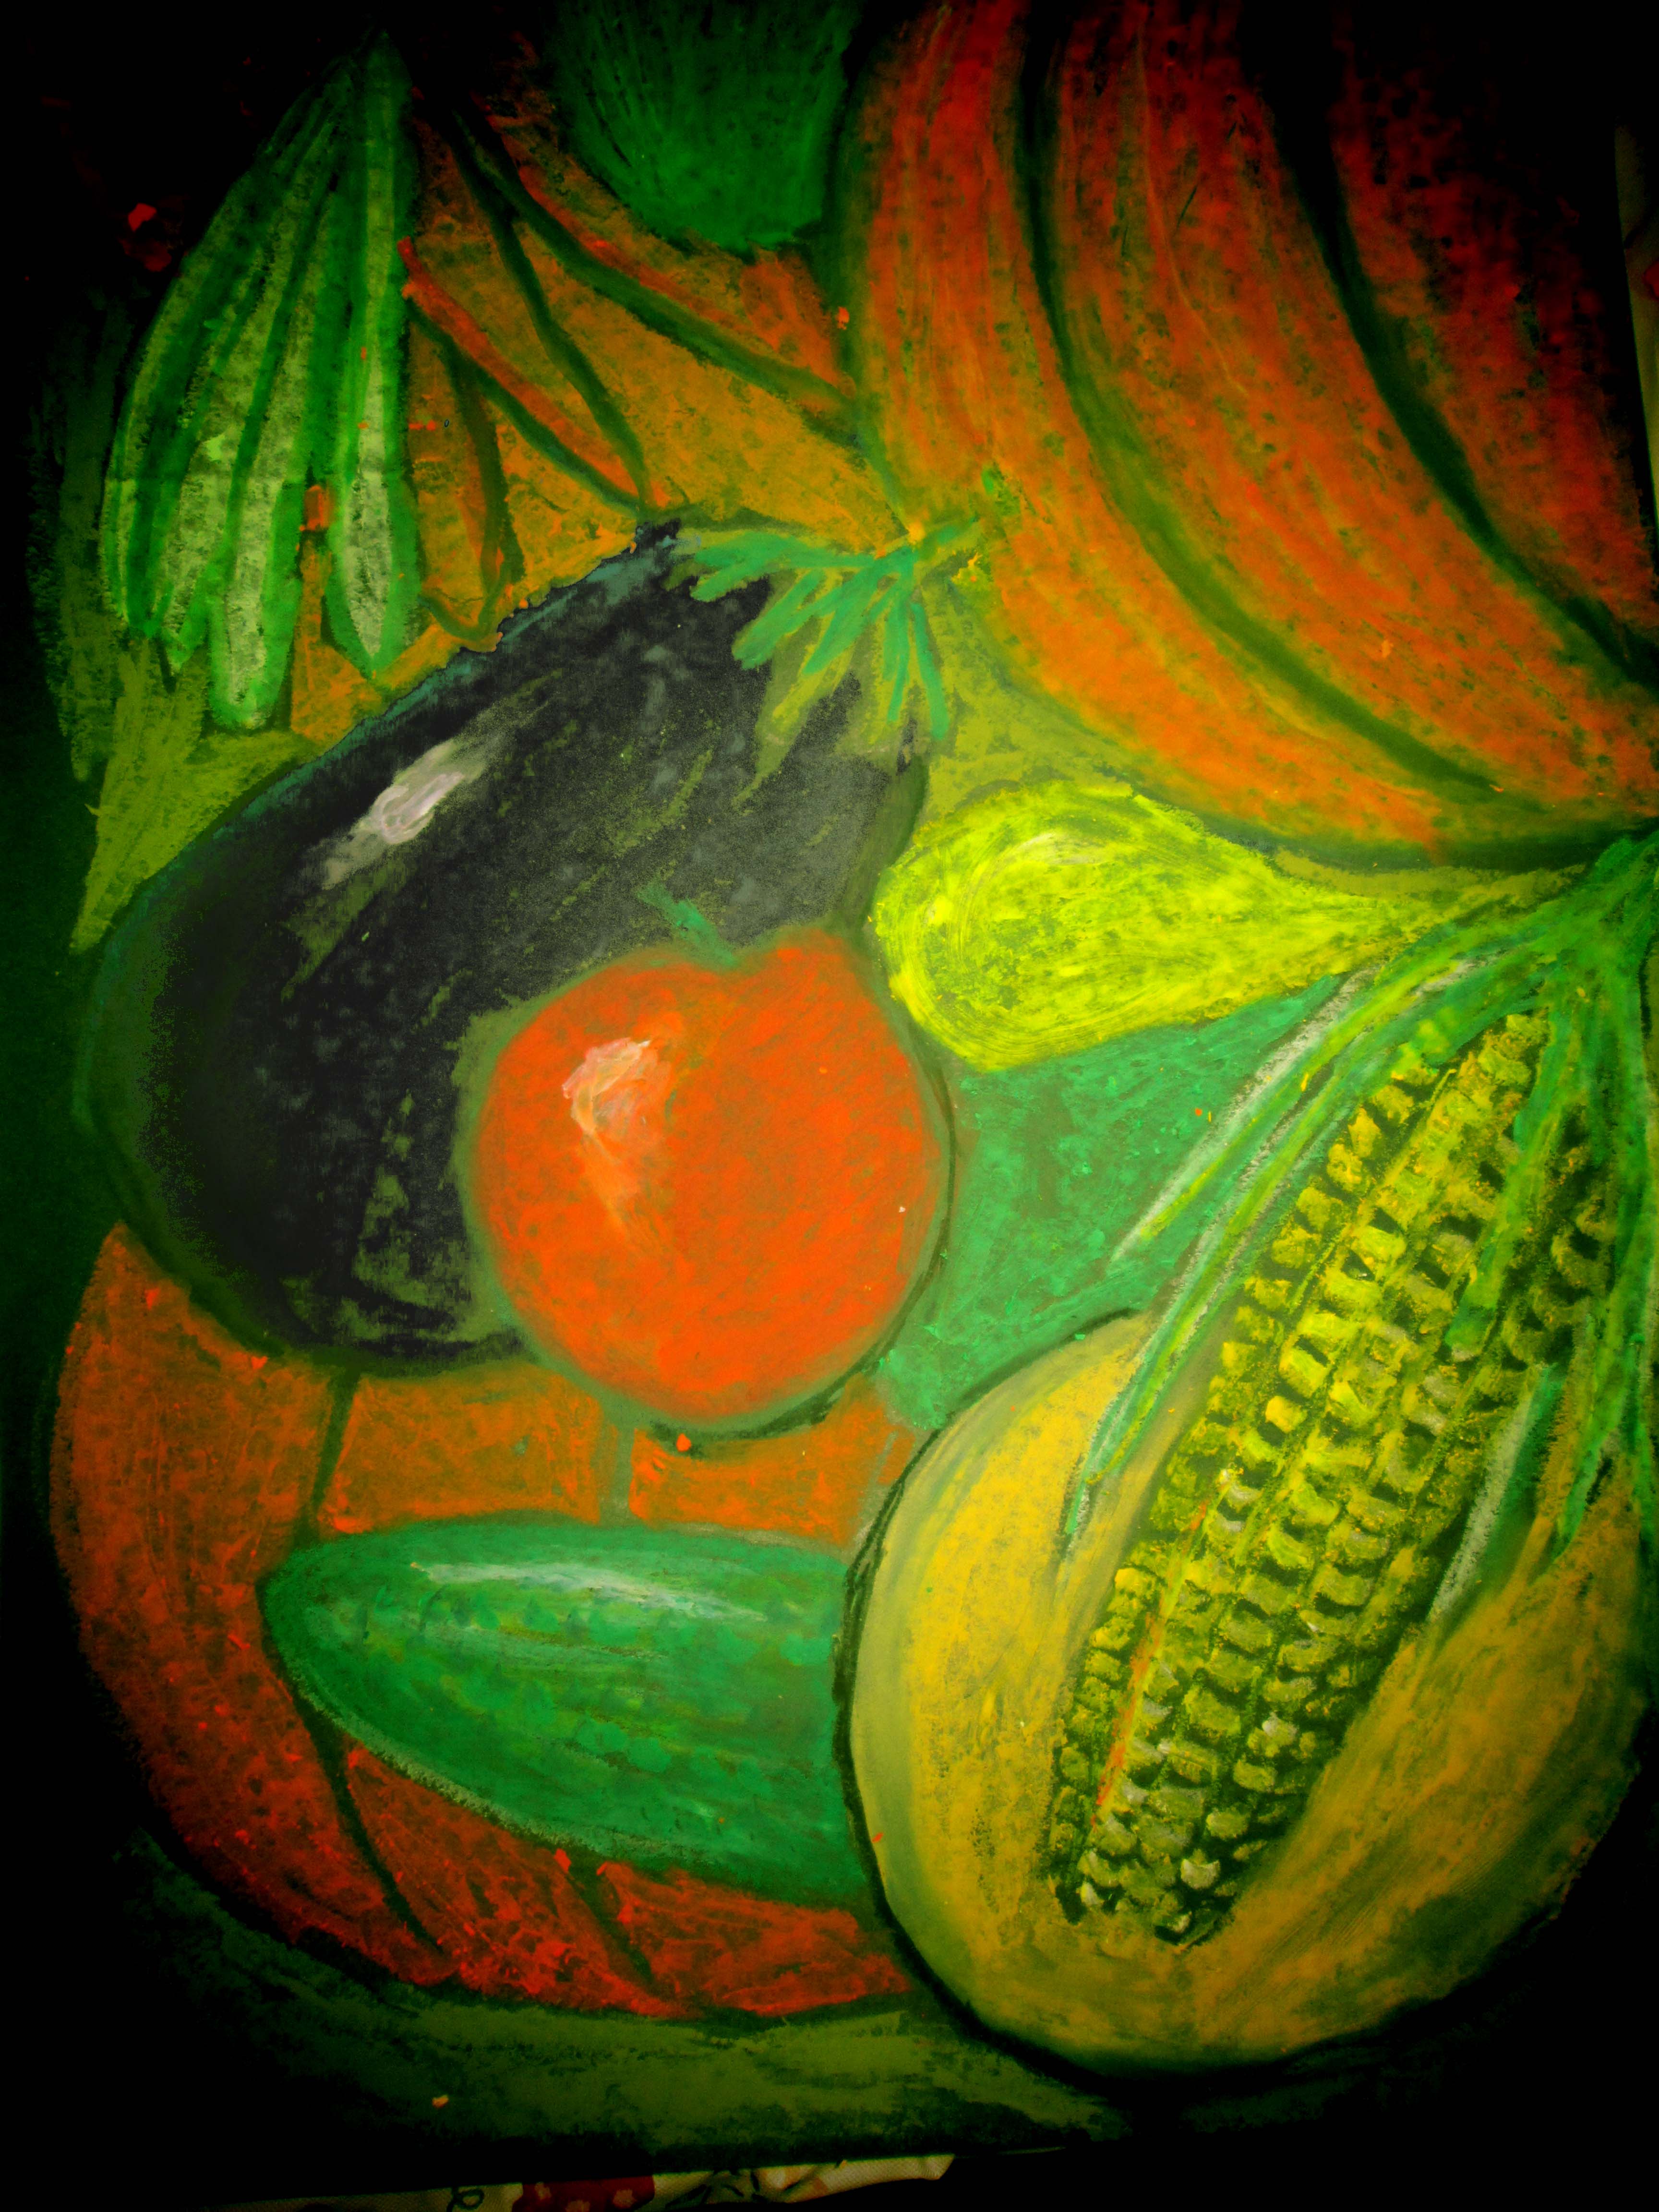
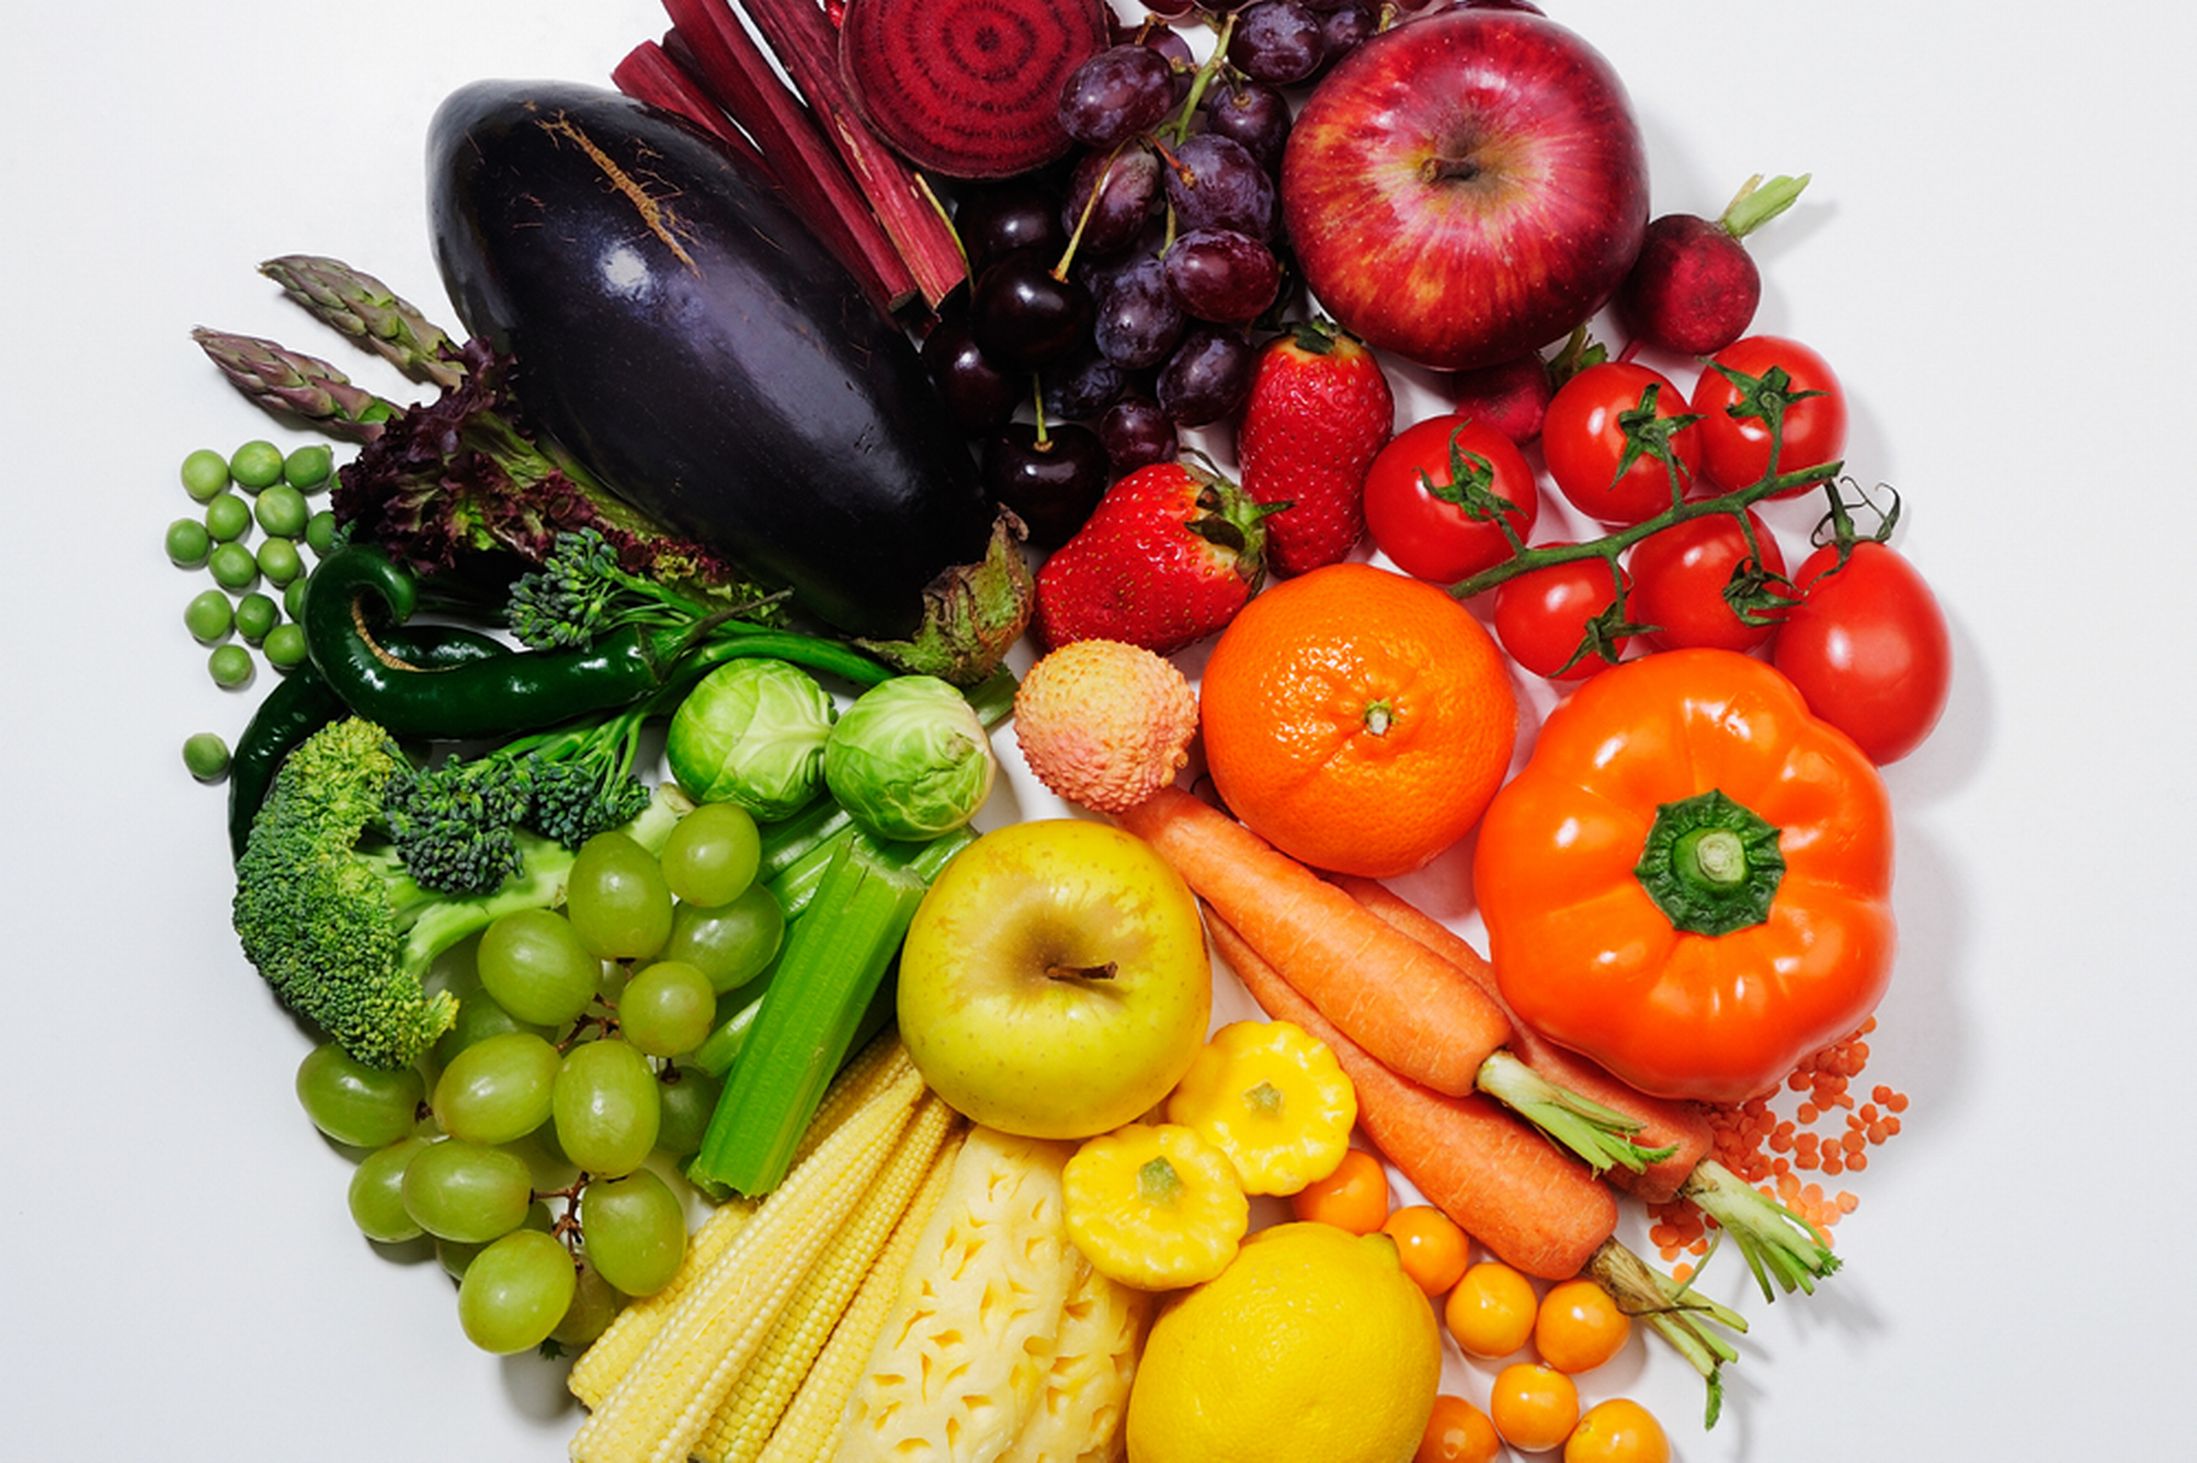
This project is based on some photos I saw in our JMG photo library. What caught my eye were the beautiful shapes and colors.
Project: Oil pastel picture of a sweet harvest.
Age: My recommendation would be second grade on up. This can be adapted for either the classroom or an at-home project.
Materials: one sheet of construction paper (I prefer black because it makes a nice background for the oil pastels), a set of oil pastels, a pencil, and a photographic image to look at. If you don’t want to use the image I’ve provided, I’m sure you can do a search and find an appropriate image to use. If you really want to go all the way, make a shopping trip to the market and make a still life arrangement of the fruits you’ve collected (by fruits I mean the seed-bearing part of the plant). 
Step 1: Start by lightly sketching in the basic shapes of your image. I always teach my students to use an overhand grip and use the side of the pencil’s point. If you use the point and push down too hard, you might make a mark that is difficult to erase.
Step 2: Take your oil pastels and begin coloring in. You can make your individual pieces seem more life like by putting in some dark coloring around the outside of your shapes, then blending them in with your finger or a small piece of paper towel. Have fun!
Step 3: In addition to shading, observe that each piece in your arrangement may have different colors in it. Include them in your coloring! You may also notice that on the shinier pieces you may see a reflection. This can be represented by using a white oil pastel, blended in with the surrounding colors.
Step 4: Clean up. Oil pastel tends to stick on your hand, but will come off easily with warm, soapy water. You may want to trim the edges of your art work, so that the page seems to be bursting with beautiful fruits and vegetables. 
Follow up discussions are always valuable. What gave you trouble? What surprised you? What did you do well? What other art media could you use to make a picture like this? What could we change about the paper we used?
I hope you enjoy this one as much as I did! Again, comments are always welcome! Happy harvest!