
Thoughts: This time I wanted to suggest something very simple (as far as materials go, anyway). Contour drawing is an exercise to develop eye, hand, brain coordination while carefully observing your subject. Today we’ll do a modified version so that more students can experience some success. This goes back to a project I wrote about a couple of months ago. Unless we exercise it, our ability to slow down and truly observe can be compromised!
Project: We will do a contour drawing of a plant (or plant part). This should be suitable for grades K-4. Again, this can be easily adapted for an at-home project. For younger children, I would choose the subject of the drawing carefully. Keep it simple for the young ones. Don’t even assume your older students can handle a tremendously complicated form. I think it’s possible to create an interesting drawing using a simple model.
Materials: You will need several sheets of paper for each student. First drawings can be done on newsprint. As the students progress, you can provide them with higher grade paper. Students will also need a drawing pencil, preferably without an eraser. As I said before, choose a subject that is relatively simple. Since it is harvest time, consider using the fruit parts of plants: pumpkins, watermelons, gourds, apples, bananas, etc. Be sure you make the subject easily visible to all students.
At home: You can make a “blind box” (for want of a better name) for your child to work in. I’ll include a picture of one I made in a few mintes. This device allows focus to be on the subject of the drawing, not the work in progress. There is probably some way of adapting this for the classroom. It is extremely difficult to avoid peeking at your work. This is one solution that lets the student focus on the subject.
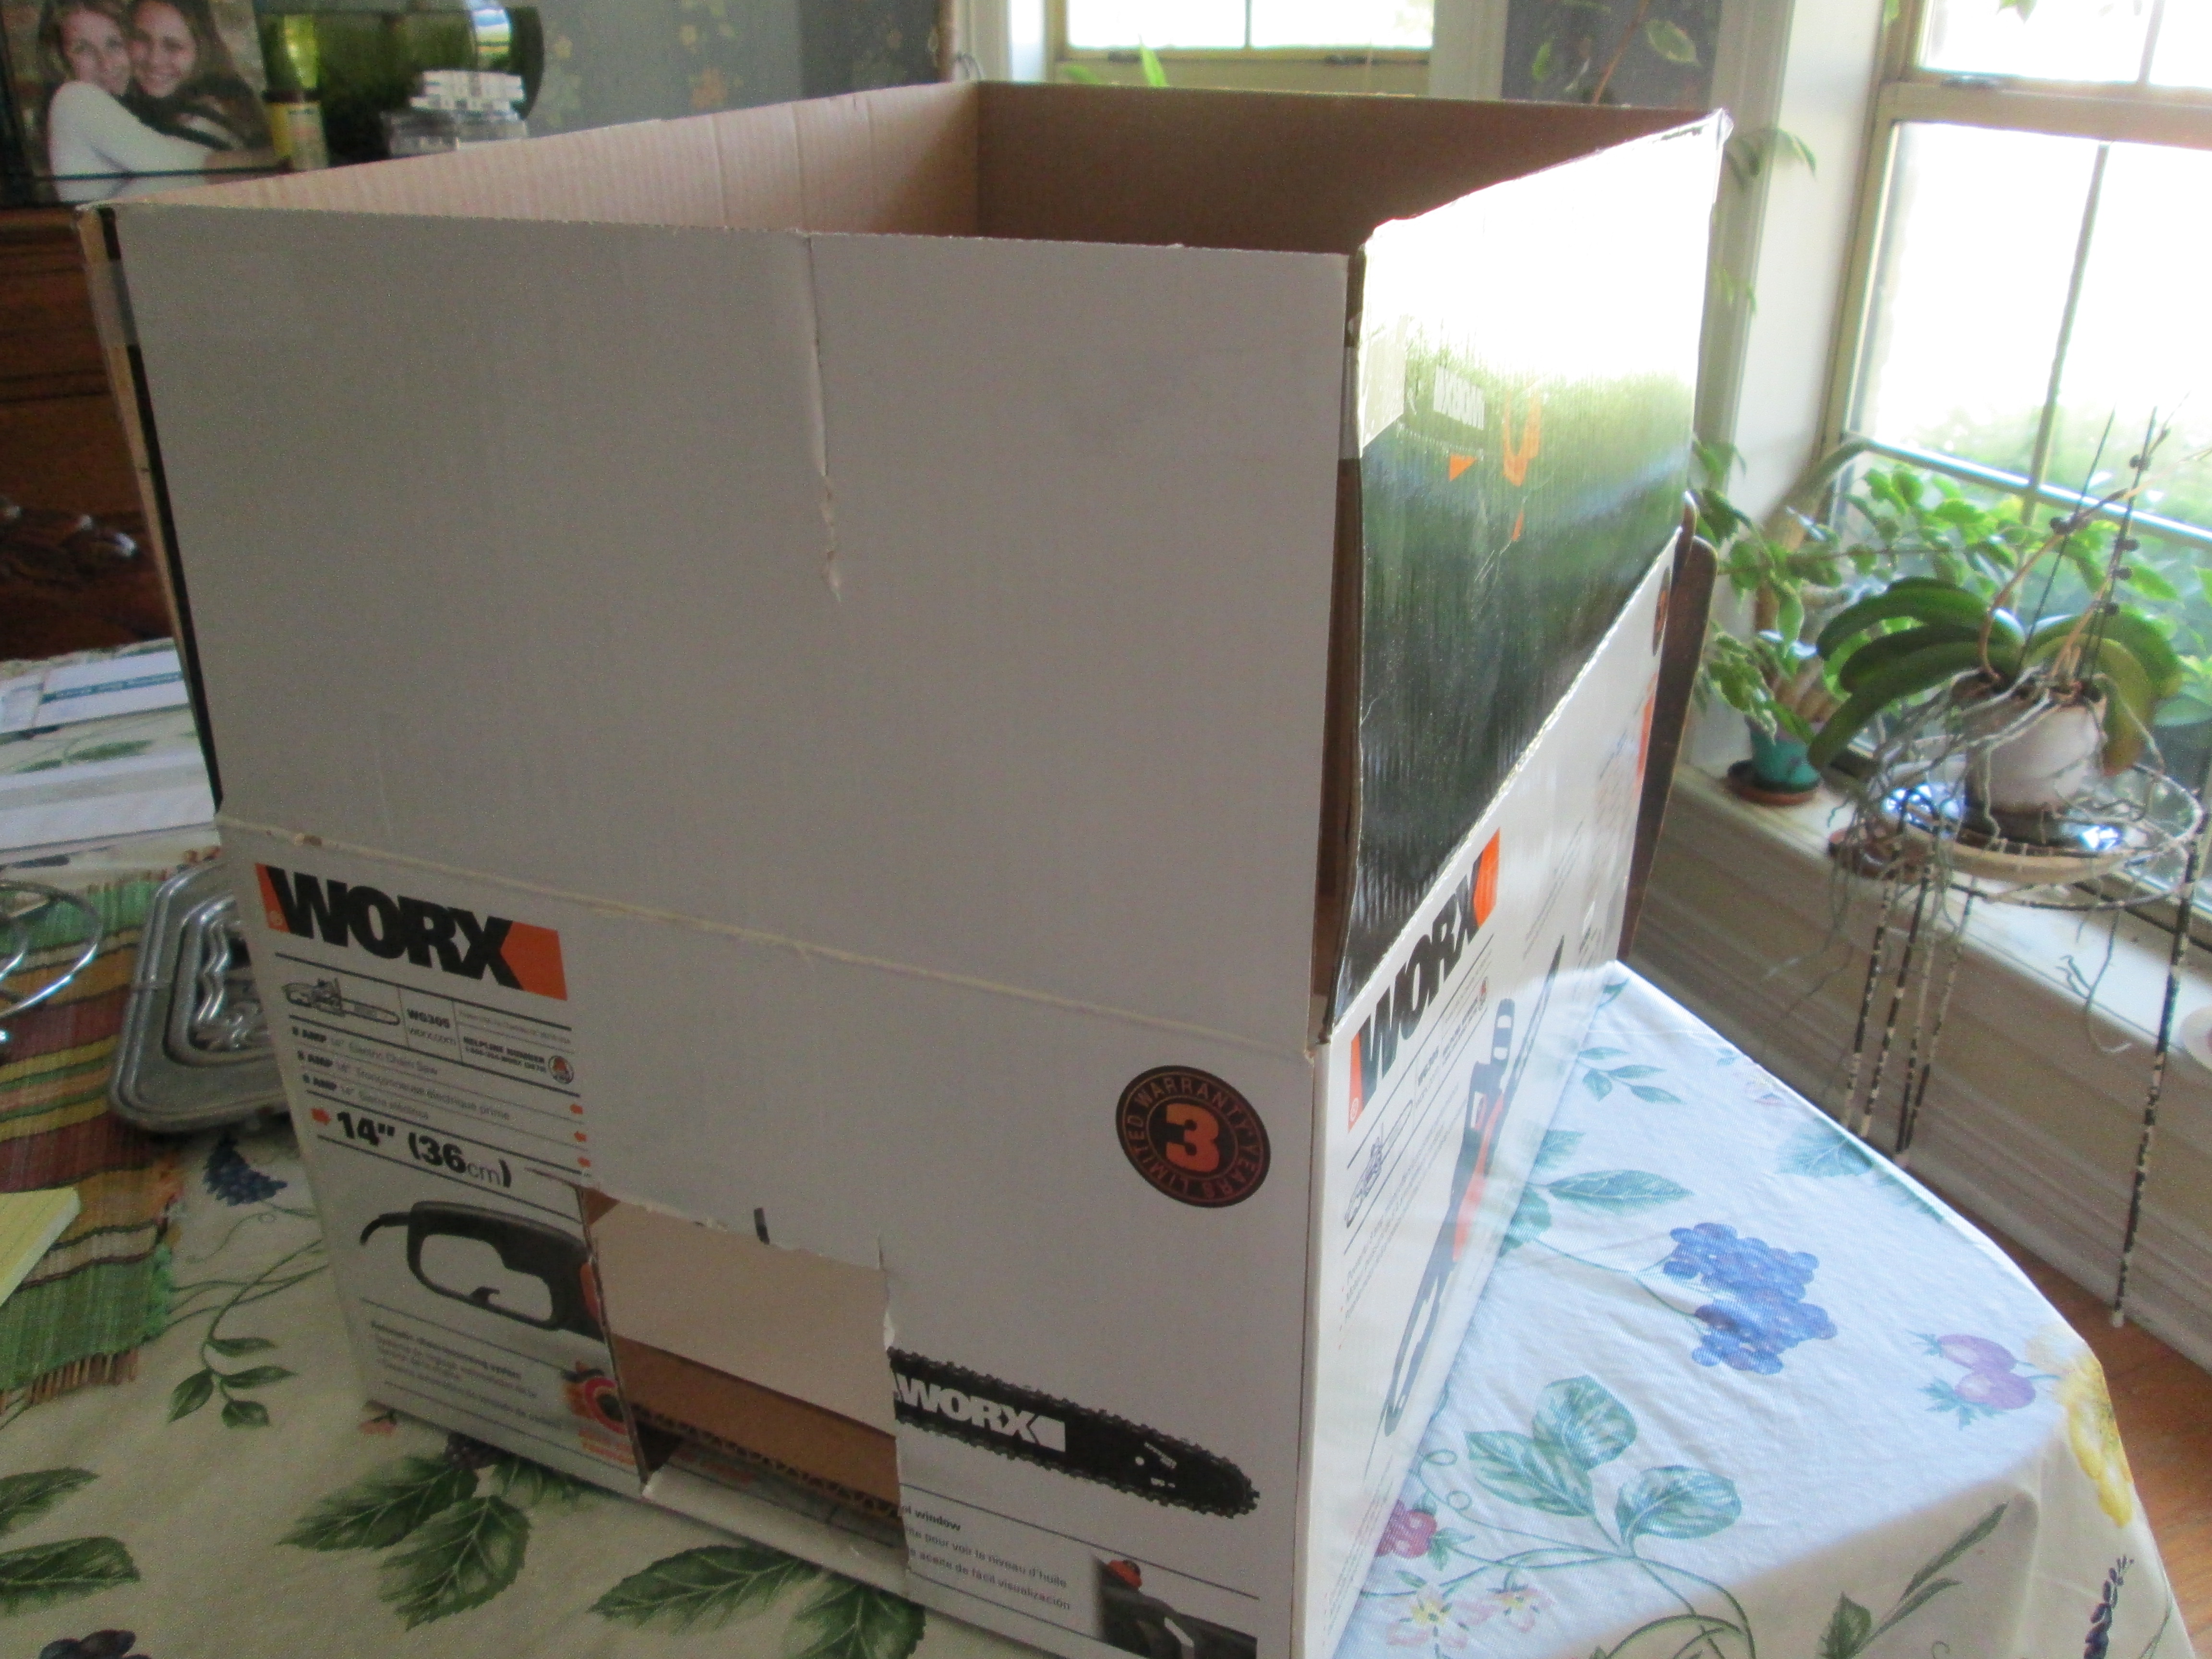
This picture shows a side view of a “blind box.” At the bottom you can see a small hole I made to fit my hand through.
NOTE: I always had an ongoing battle with students about using erasers. In this activity, erasers break the flow and the purpose of the whole exercise. In addition, excessive erasing results in torn paper.
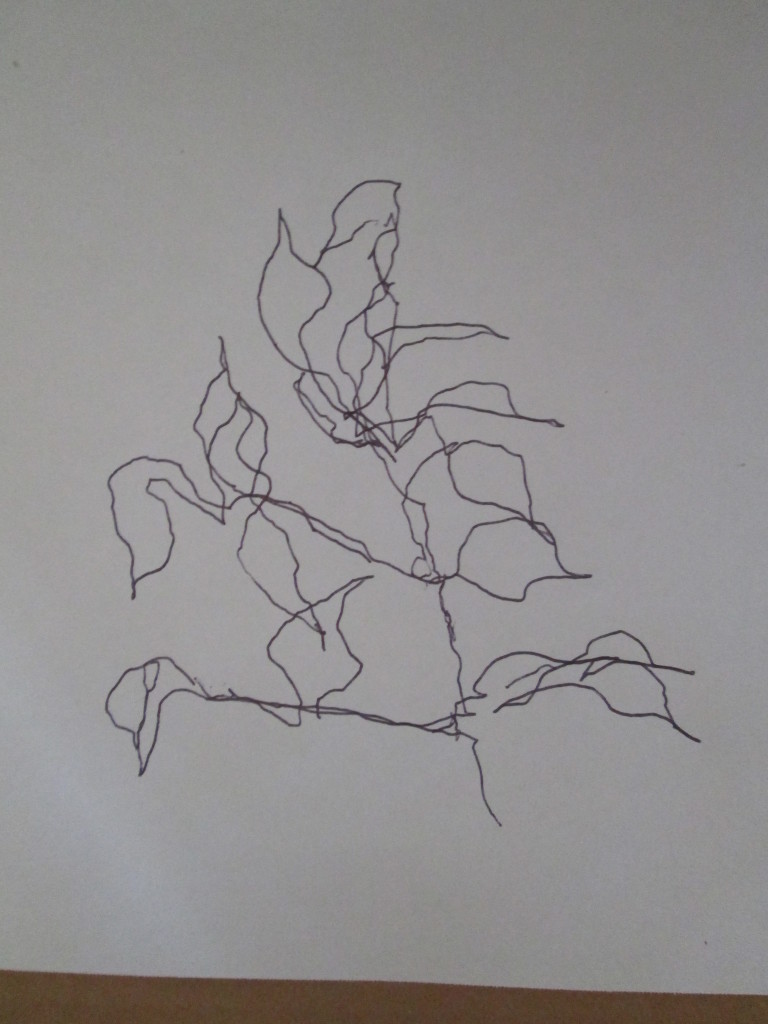
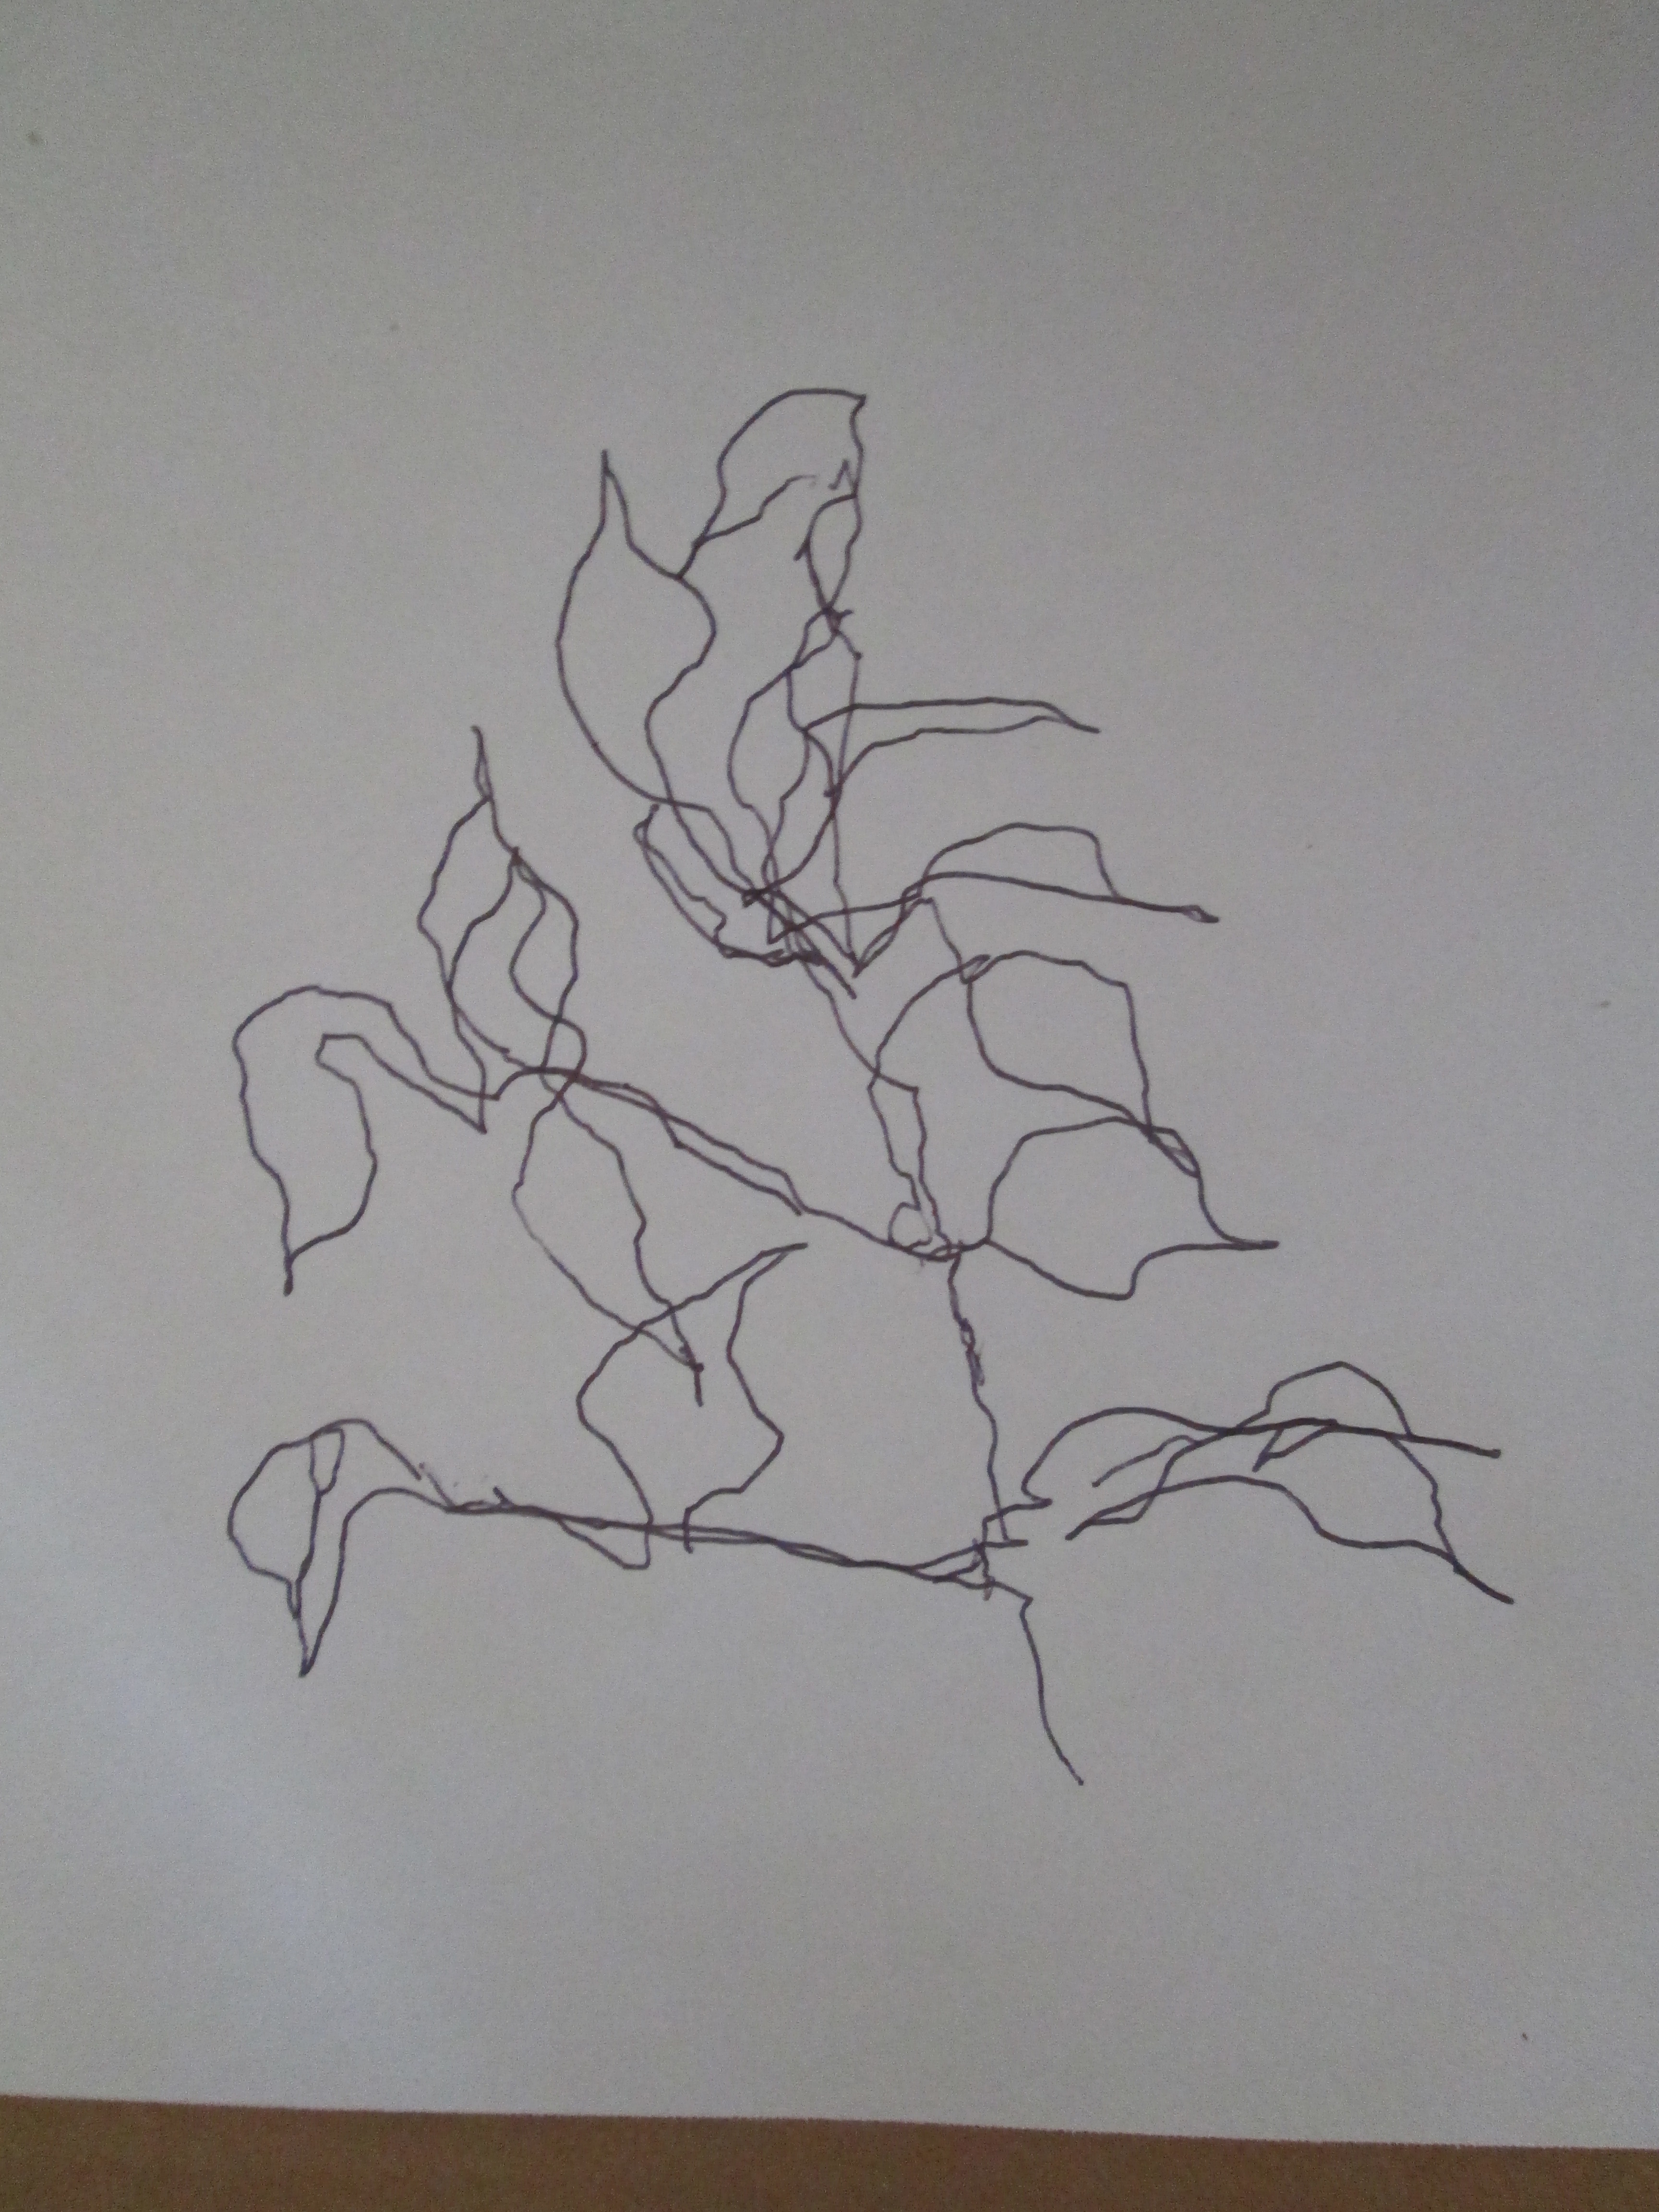
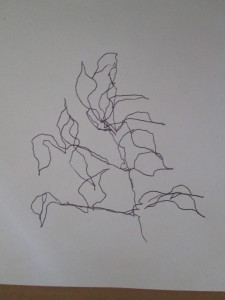
Step 1: Show students some examples of contour drawings. Blind contour drawings are the best. As a beginning, we’ll be doing a modified contour drawing. You have to sell the idea that the class is going to do some things that most children aren’t used to doing: slowing down and observing intensely. Also explain that you’re all going to make several attempts. Children tend to be self-critical, so some are likely to complain that. You are the key. You are modelling a willingness to give it a go. As YOU do your model of what the experience of what a contour drawing is like, model thinking aloud.
Note: I did one and I went way too fast. I think the idea of starting with a simple shape (such as a simple leaf) is a good one. It might be beneficial to do some sort of relaxation exercise before the class begins.
Step 2: Show your contour drawing and discuss. Let the children begin. Suggest a starting point on the subject. Constantly remind the children to follow their eye around the contour of the subject. The eye must travel very slowly, and the pencil must follow. The pencil should NEVER be lifted from the page until the drawing is complete. In these first few drawings, allow children to look at their paper. At some point, you may try doing one without looking. Talking should be avoided. Talking leads to judgement, either of one’s own work, or that of a neighbor.
Step 3: As you finish, share examples of student work, emphasizing effort rather than how closely the drawing reflects the subject.
 Note: As you practice, continue to refine the process of slowing down and observing. The next step, if kids seem willing, is to do a blind contour drawing. In this exercise, everything is pretty much the same, only the students have to refrain from looking at their drawing. All focus is on the subject. tep 4: As you finish up, show examples of student work. Discuss the process. Question: do they understand how this might make them better artists?
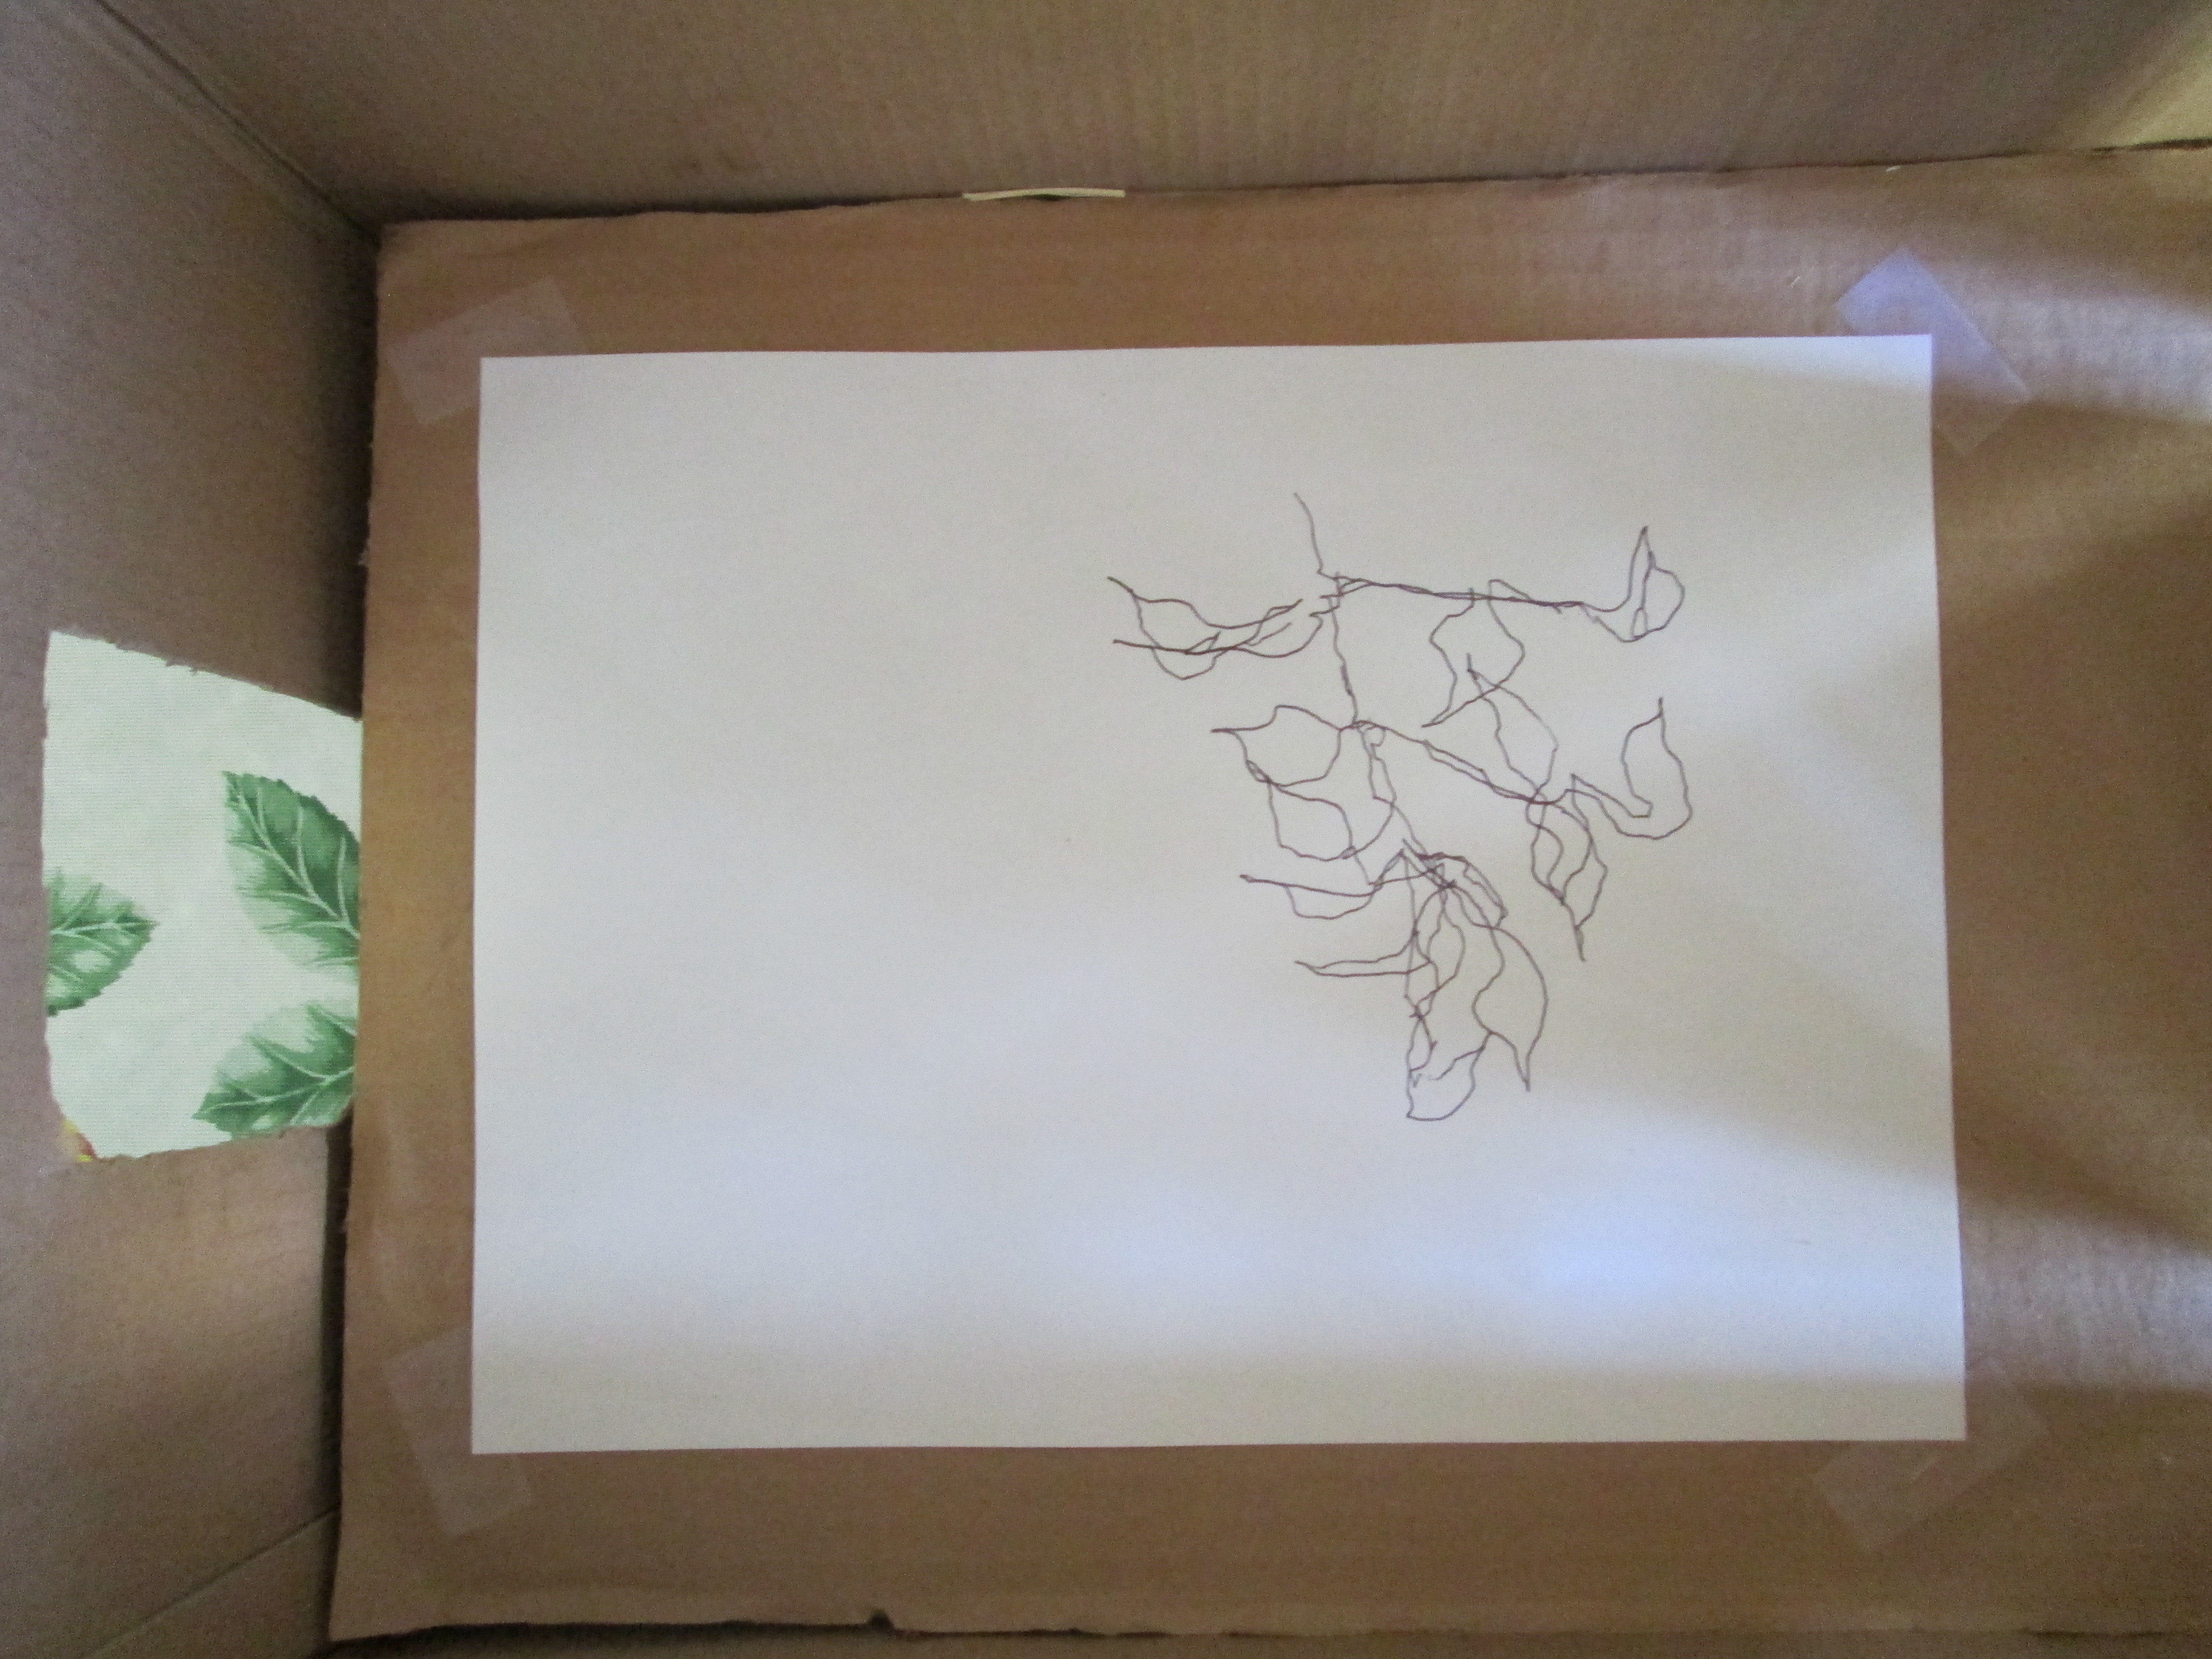
This view of the “blind box” is looking down from overhead. You can see the opening I made for my hand on the left. I tape the drawing paper down at the corners to hold the paper in place (my non-drawing hand will be outside the box).
As always, your feedback is appreciated! I would love to post examples of student work. My e-mail is potterlanestudios@gmail.com.
Until next time– Dave Cain, the Green Guy
Recent Comments