
Thoughts: It occurred to me, as an afterthought, that designing a thank you card would be a terrific idea, not only for this holiday season, but for the whole year. Maybe some of you could design a card you can take to the printers and have copies made up that would fit into standard-size envelopes.
Here is a draft of an idea I had when writing my last blog entry:
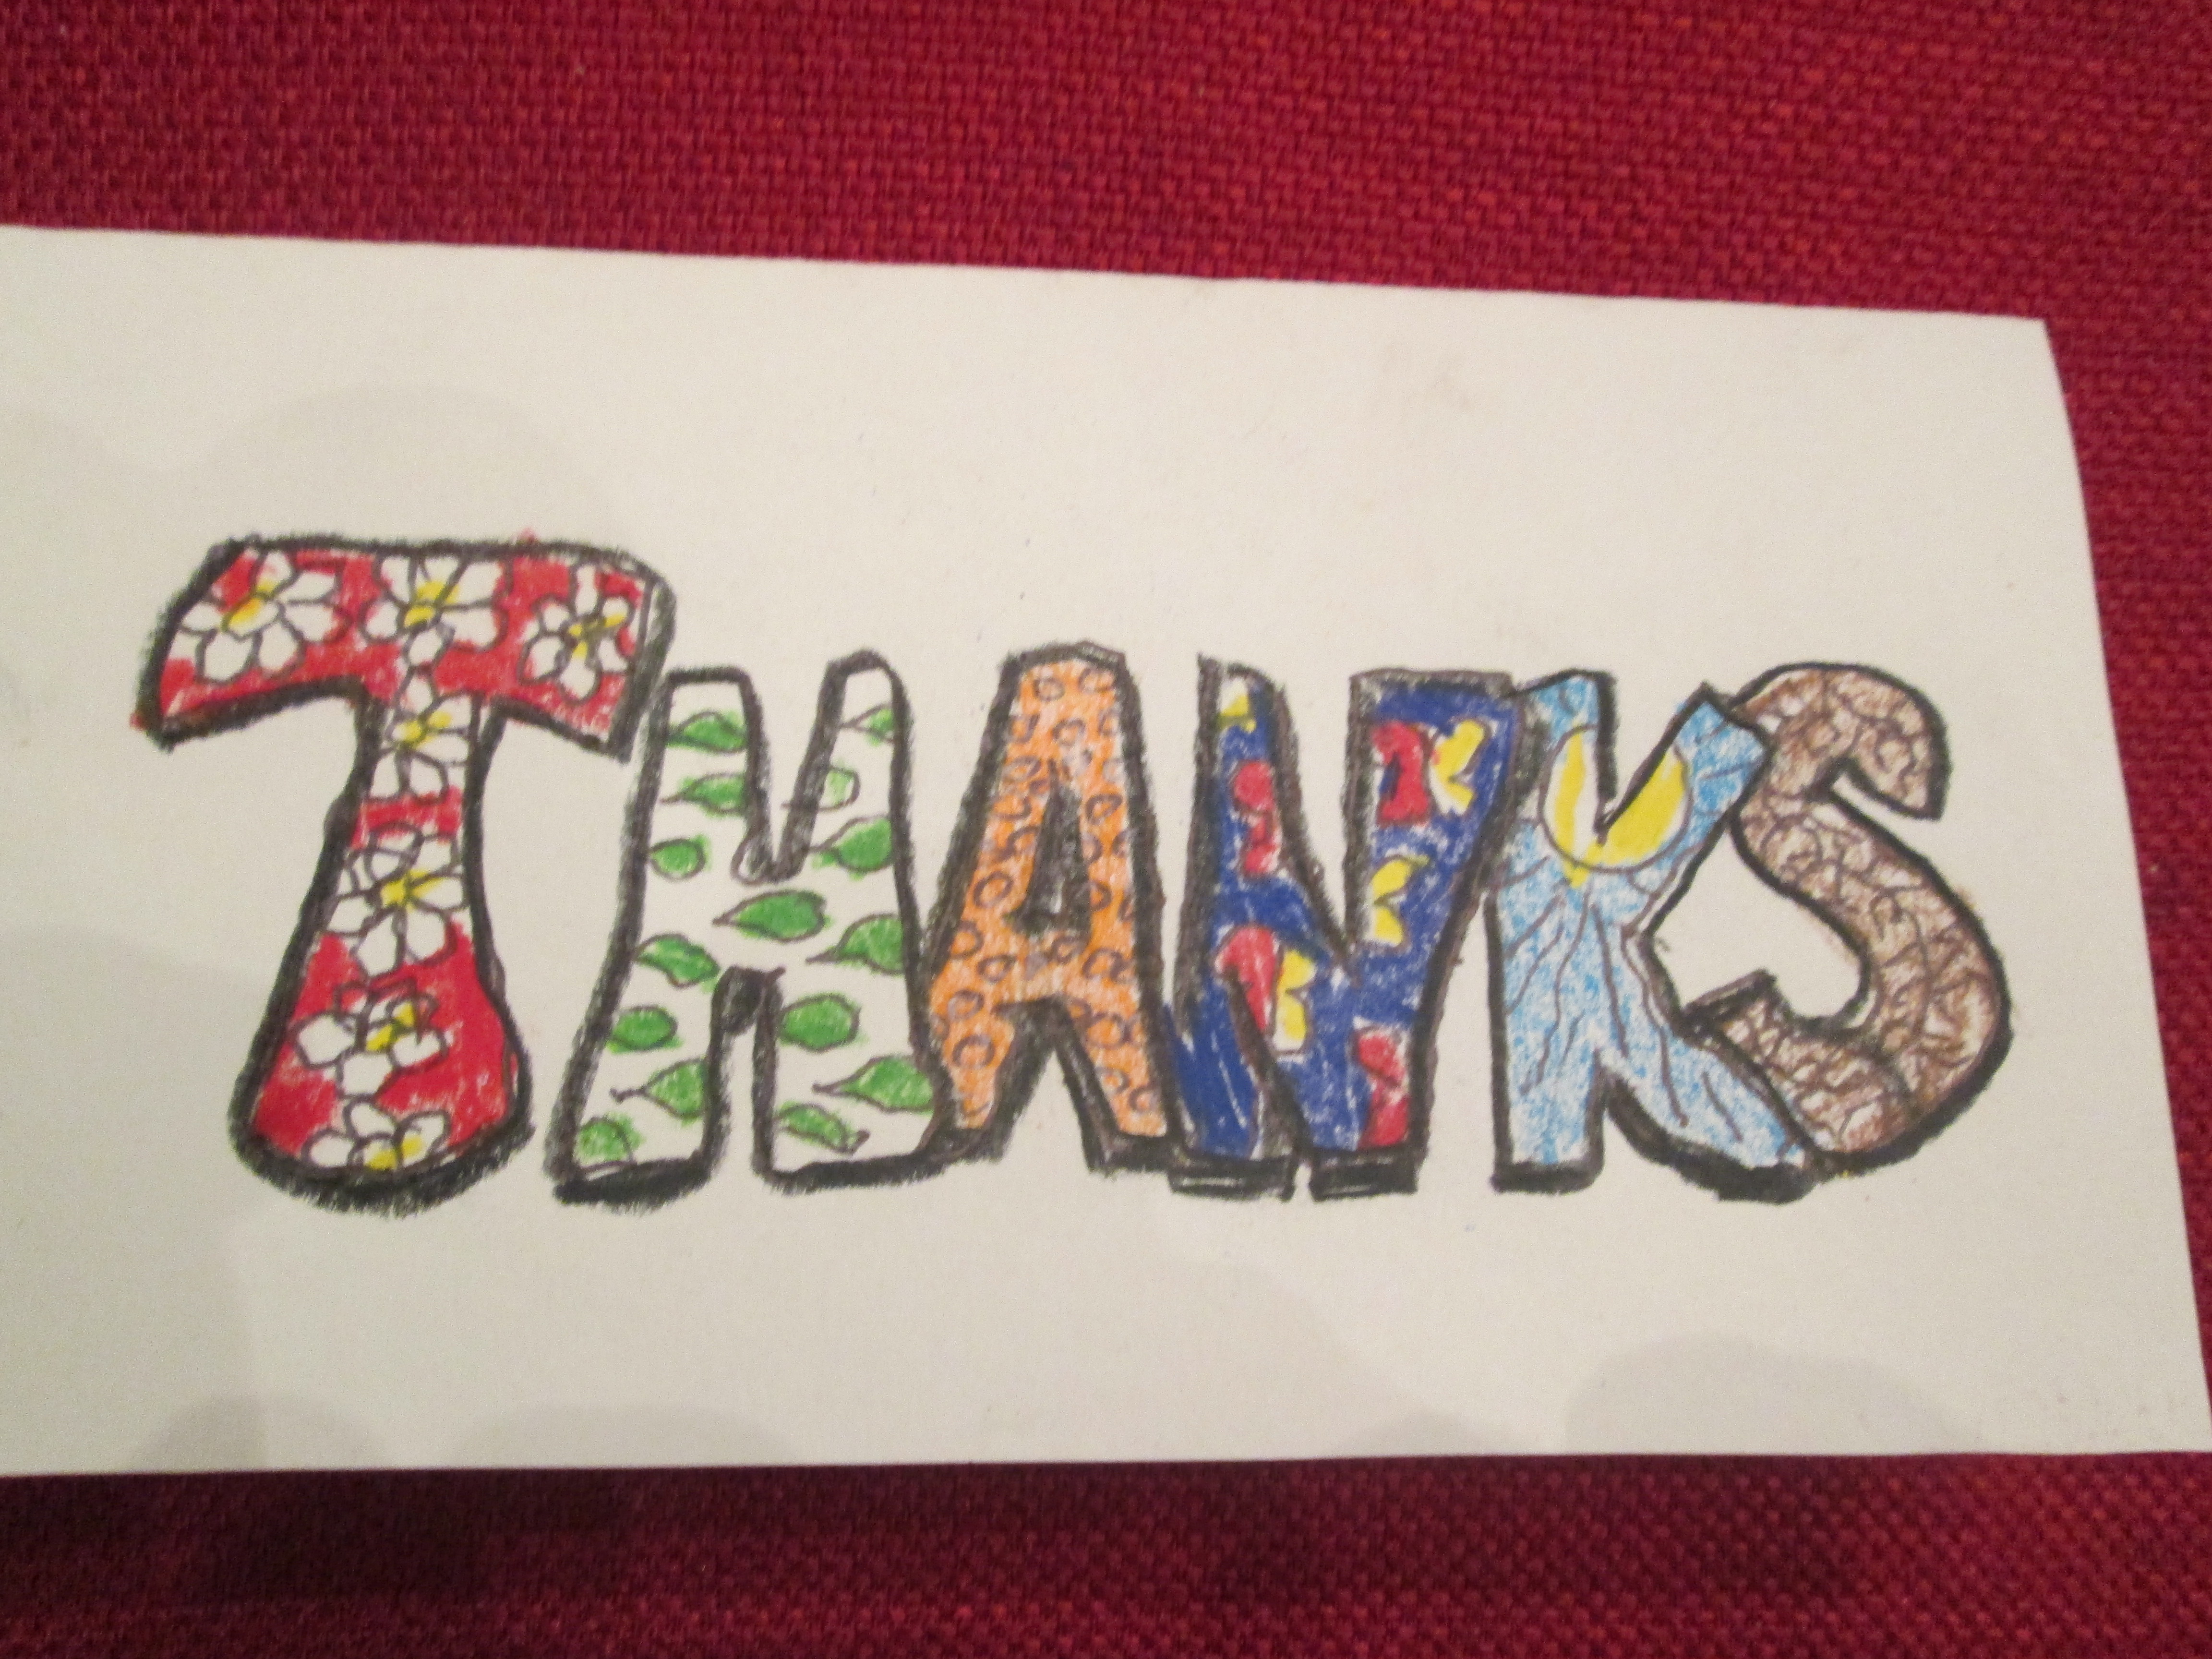
As I said, it’s a draft. I think there are some problems with it. The background is white, which is okay, but I love color. I’m thinking that a lightly colored background would be nice. Origami papers offer a nice selection of colors.
The bubble letters may be difficult for some younger children to draw. Also, the way some of the letters overlap might create a problem actually reading them. I would keep the letters separate from each other so they stand out more clearly.
The letters were decorated with various garden-related motifs. I wasn’t happy with that, either. (Maybe it was just one of those days!) As you can see (I hope) the T has a flower head theme, the H has leaves in a pattern, the A was supposed to represent seeds, the N butterflies, the K a sun with rays, and the S some fibrous roots.
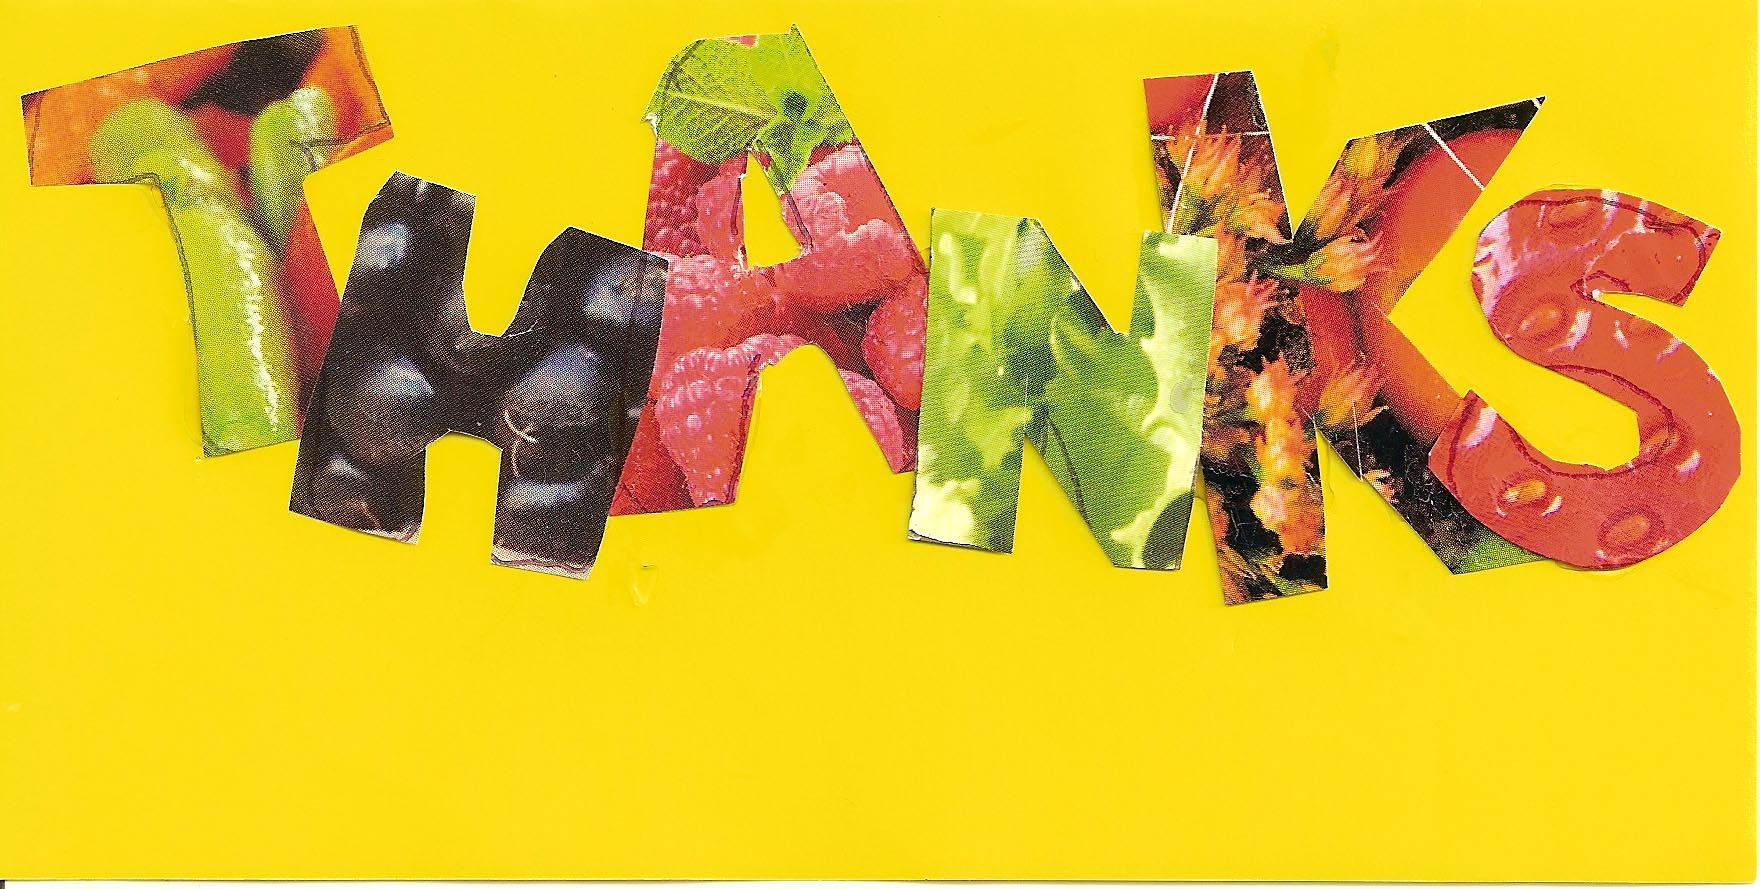
While I was away on trip, I got the idea to use pictures from seed catalogs to create the letters, then glue the letters onto a colored background.
Project: We will create a design for a thank you card that will be suitable for use year ’round. When I was growing up, my parents drilled the idea into me that it was good manners to acknowledge someone’s gift. I don’t see that happening as much any more. Maybe we’ll start a comeback! This is primarily aimed as an at-home project, though it could be adapted for a classroom situation. I think that second grade on up should be able to handle making the letters properly.
Materials: A nice color for a background you can use to glue letters on; a glue stick; scissors; a Sharpie marker; a seed catalog; a ruler.
Steps:
1) OPTIONAL: Cut a piece of backing paper 3 1/4″ by 6″; this paper will reinforce the thin origami paper. My finished design did not use this. You would only do this if you were making one card. The 3 1/4″ x 6″ measurement allows the paper to be put into a standard size envelope. If you want to put the design on the front of a folded card, cut your paper to 6 1/2″ x 6 ” then fold the larger side in half.
2) Cut your origami paper to the same size ( 3 1/4″ x 6″) and glue it to your backing paper
3) Take your seed catalog (or magazine or newspaper) and find pictures of flowers and vegetables that show a lot of color and visual texture.
4) Depending on whether you want to orient your design vertically or horizontally, draw and cut six rectangles–one for each letter of the word THANKS. If you make your rectangles too large, they won’t fit on your background. If they’re too small, they can be very difficult to cut. My rectangles were about 1″ wide and between 1″ and 1 1/2″ tall.
5) Use your Sharpie to outline bubble letters on these rectangles. The letters will need to be as big as possible, so extend your letters out to the edges of the rectangles as much as possible.
6) Plan before you glue! Try your letters in different arrangements until you find one you like, then go ahead and glue.
7) Optional: Once glued onto the background, the letters may be outlined with a Sharpie to make them stand out a little more.
Carefully clean up after yourself. If you like your design you can have copies printed up for you, or you could scan the design onto your computer and print out however many copies you want.
I hope all of you enjoy a safe and happy holiday season!
Recent Comments